Crankshaft gear removal / installation
Dec 2003
Gear removal
Removal of the power take off end's interference fit gear. This gear runs the oil pump and tachometer. It needs to be heated so that it expands and allows easy removal and installation. About 1/4" away from the gear is a rubber & metal seal. We didn't care to protect the seal during gear removal as it was going to be replaced - but upon installation we did care to protect it.
Here is a short video of the gear removal. Tri-finger gear puller is attached to the gear with a resonable amount of pressure exerted. The gear is heated and when it's hot enough it expands and readily slips (notice the gear puller dropping near the end of the video). We heated the gear only once during removal - but perhaps could have reheated it as during the pull off it was starting to cool and contract making the pull off difficult. The rubber seal was destroyed. I did not have much concern for the ball bearings behind the seal as they did not receive direct heating (the metal backing of the seal deflected most of it - but they did get warm).
Video
Gear Removal
2003-12-07-srv540-gear-removal
WMV, 480 KB, 22 sec

Gear Installation
We had fun here - a Rube Goldberg contraption.
In the end - most of it was discarded and we just made it happen.
In the end - most of it was discarded and we just made it happen.
The goal was to 1) have even heating of the gear and to 2) quickly get the hot, expanded gear onto the crankshaft before it would cool. We did not want to exert force on the crankshaft by pressing it on. We also did not want to damage the new rubber seal from the heat in this process.
So we needed a device to rotate the gear at an even pace. In comes the cordless hand drill (with a zip tie to hold the trigger at a set speed - easier said than done). Now we need to support the process so that the gear is sitting, roughly, over the end of the crankshaft - to quickly drop it on and perhaps give it a quick tap to make sure it's seated (rests against a shoulder) - in comes some string from the ceiling to hold the drill. Now we need to fasten the gear to the drill but not too close as a torch will be aimed at it - sacrifice a metal hanger to make an extension hook. We also need to hold onto the gear - perferably so that it'll still slip onto the crankshaft - so we need to hold onto it externally - more hanger wire. Now, would the hanger wire, when the gear is to be heated, overheat and melt away dropping the gear, or worse become fused to the gear (fortunately neither of these was an issue). Heating torch needs to be fastened and pointed to the gear (that "even heating" desire plus that would leave my hands free) - in comes the foot ladder, a couple 2x4's and some trusty duc tape. Now, one item not mentioned was a small 2 inch lenght of string between the drill's chuck and the first metal extension hook. Its purpose was to provide a flexible coupling between the "stationary" drill and the moving items. The goal was so that the moving items would always be hanging straight down without any influence by a not perfectly aligned drivetrain. The string in this project proved some weaknesses - but before that - how about proteting the seal from heat?
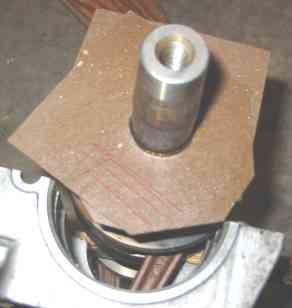
The gear sits about 1/4" inch from the seal. With the motor sitting on end the seal was a bit of a cup. We filled it with water in hopes that any heat near the center where the gear is would be dissipated. On top of that we placed a barrier - fiberboard soaked in water. This might have been overkill but it was quick and easy and I certainly would not want to have to pull the motor apart and re-do the process due to a damaged seal.
Now, what about that string... First, the string suspending the drill - there was perhaps 3 to 4 feet of it between the drill and the ceiling. When the drill was activated that amount of string started to spin - either to counteract the drill's torque or to simply "unwind" under the weight of the drill. With the drill spinning it would wobble. The suspended gear would thus really wobble. The quick fix was to pull the shop press over and fasten the drill to it (more duc tape) to keep it stationary - now things are looking up. Drill moving, gear moving - but not quite moving in a nice circle but perhaps good enough (out of balance?? It's low speed but that string from the chuck is quite flexible). Let's turn on the torch. Now life gets way out of whack. The force of the flame blows the gear away. Watching it oscillate for 30 seconds or so and it's evident that the gear typically swings back at the same point each revolution - heating really only one spot on the gear. Trials to manually influence the extension hook to be steady made life worse. This isn't going anywhere. What to do - replace the short chunk of string at the chuck and go solid metal? Nope - scrap most of it and go manual.
We removed the torch from the stationary setup and left the drill turned off - I'll hold the torch and heat the gear manually. Dad held the extension hook stationary to keep the gear from being pushed about by the flame's force. When the gear was showing a dull red Dad pulled the hanger from the extension hook and dropped the gear onto the crankshaft - one could hear a solid click as it rested against the shoulder. He pulled the hanger wire off of the gear and I tapped down onto the gear with a section of pipe - the gear was already fully seated. Wait for the gear to cool and then remove the fiber board and water (which were warm). Project done.
Drill suspended from the ceiling via string.
Showing the connection to the shop press to keep it stationary.

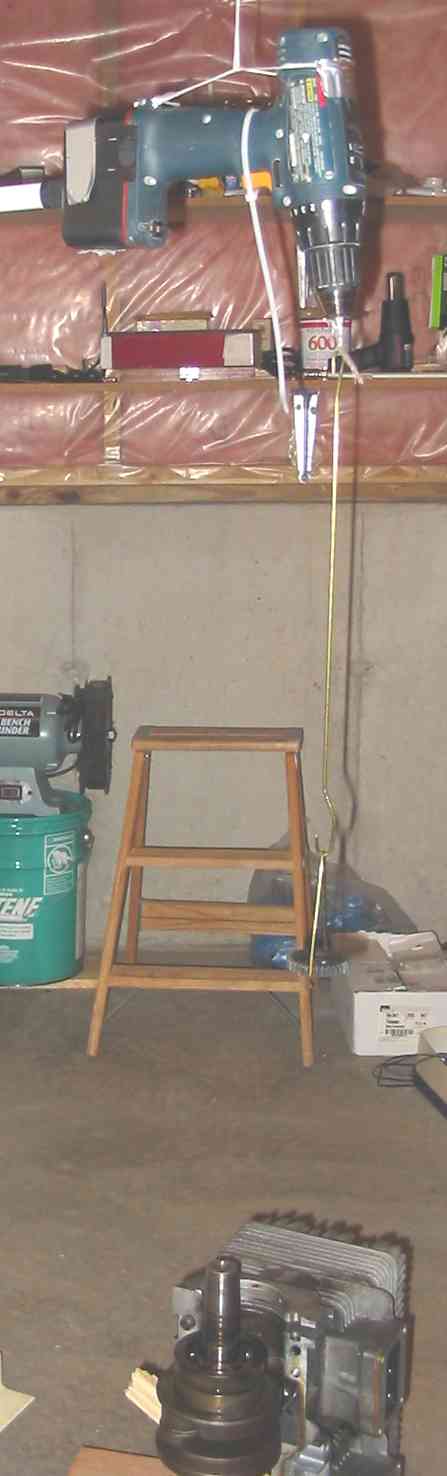
Suspended gear with the fixed torch


Fiberboards soaked with water
(they were sliced in half so that they could be pulled out from the side with the gear installed)
Well, down here I should have a picture of the installed gear....